8 Beispiele – Auswertung von Scanbildern in 2D und 3D
3. February 2022In the Bavarian town of Hutthurm, north of Passau, the alfavision company has a device that at first glance seems a bit unspectacular: a surface scanner for highly reflective surfaces. We met the managing director and qualified mathematician from alfavision, Karin Donner, virtually and asked him about this surface scanner.
When you chat with Karin Donner about surface precision in grinding processes, her enthusiasm for this subject is written all over her face. She takes you into the world of optimetry, grooves and depressions, burr formations and edge grinding.
The company alfavision, whose business is run by Karin Donner, also cultivates a special quality: you really listen to your customers. It was also such a customer request from the electronics sector that led to the development of a special scanning process by alfavision.
The challenge was to inspect large, flat surfaces coated with copper for depth-related defects. “You can’t do that with the classic fingernail test,” explains Donner and is very grateful to her customer at the time for his persistence. If he hadn’t pushed so hard for a solution to his problem, the alfavision surface scanner wouldn’t exist today.
Central challenge: Recognizing deficiencies
The challenge in any grinding process is to identify processing defects in good time. These include faint bumps in a lapping Processing of the material, but also minor burrs on the edge of the component, scratches on surfaces machined by turning and fine bulges in countersunk holes.
It depends on dents and bumps. If I catch my fingernail, the surface defect is a depression or elevation. If I don’t get stuck, the error is usually superficial dirt.
CEO Karin Donner
The fingernail is traditionally used to manually check such errors. The manual inspector uses his fingernail to distinguish between light scratches and deep scratches. This fingernail test becomes a problem when testing large, flat surfaces or very, very small surfaces.
There is also a time problem. Said customer, who had initiated the development of the alfavision surface scanner, had to carry out a 100 percent check on both sides of his components. To do this, each component is placed under a binocular for the surface inspection, and it also has to be turned under it. This created a bottleneck in production, in which the testing process significantly delayed production. While production was going on, the testing process was still running. It was no longer possible to keep up with the acid test, especially since the parts to be tested were so small that they could only be tested with binoculars.
Our customer’s target was a test time of 3 seconds per component for both sides. Our automated inspection process was able to solve this problem in 1.5 seconds per top, bottom and side component inspection.
CEO Karin Donner
Valve plates provided the impetus for the surface scanner
Karin Donner tells us about numerous test series with a prototype. A feasibility study ran parallel to the development of the surface scanner for more than a year. They were about to give up, but the customer insisted on getting a solution from Alfavision. The goal was to speed up the much too slow manual control with an automated process and to meet the customer’s time limit, if not even undercut it.
Parallel to this development process, an additional problem was encountered. What to do if the surfaces to be tested are very reflective or shiny? The conventional method of binocular testing fails completely in such cases. And there are many highly reflective and specular surfaces, especially in the glass and electronics industries.
You can see the depth on matte surfaces. The inspector immediately recognizes whether it is contamination or a surface defect. The challenge in this project, however, was to identify processing defects that are only visible under a certain direction of incidence of light.
When the fingernail is no longer enough
When testing components, it is about the weak bumps already mentioned. In the case of our valve plate, the size of a shirt button, which is not flat and even wavy, the customer used to inspect these workpieces binocularly, says Karin Donner. The valve plate is placed under the microscope with tweezers, examined, turned and checked manually.
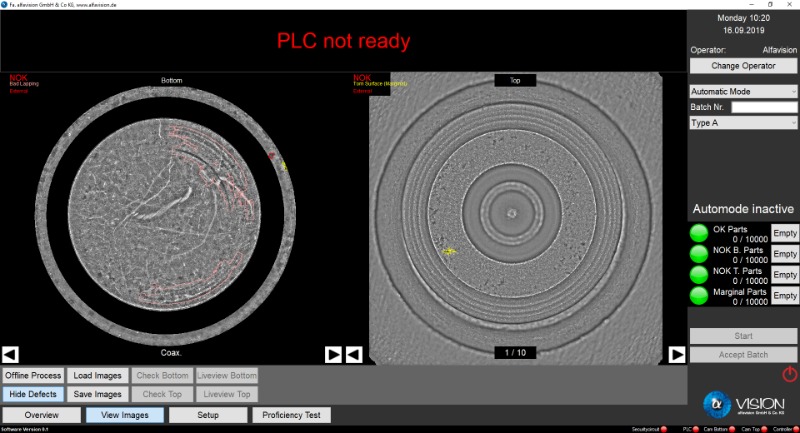
Some components can only be checked under a microscope. This manual checking delays production.
Photo: alfavision, measurement image of a lobe.
At that time, the customer made electronic chips from copper-clad laminates. There were faint black dots on these large and flat areas of copper that could only be identified as dirt. This dirt is etched away during the production process of the valve plates. But there were also deep dents in this copper laminate.
“It’s deadly, because the dent eventually turns into a hole when it’s etched. This customer wanted an automated fingernail test. At that time, they had very high quantities in production and they couldn’t keep up with the acid test,” says Karin Donner.
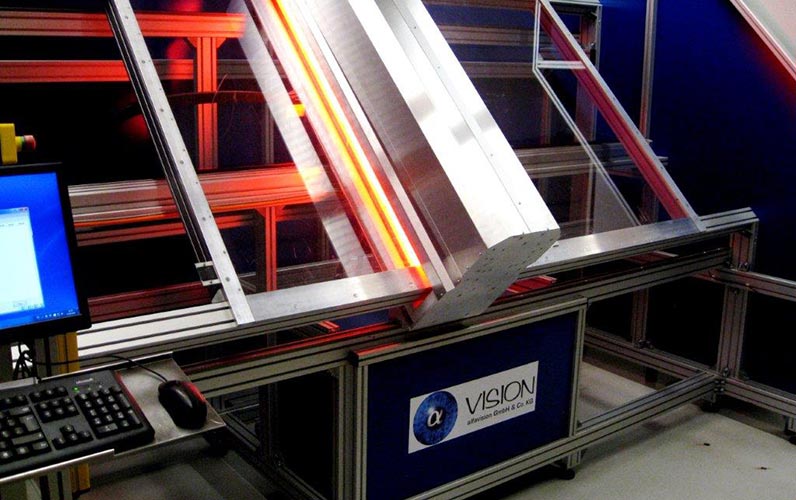
alfavision’s surface scanner detects defects on highly reflective and mirrored surfaces. Photo: alfavision
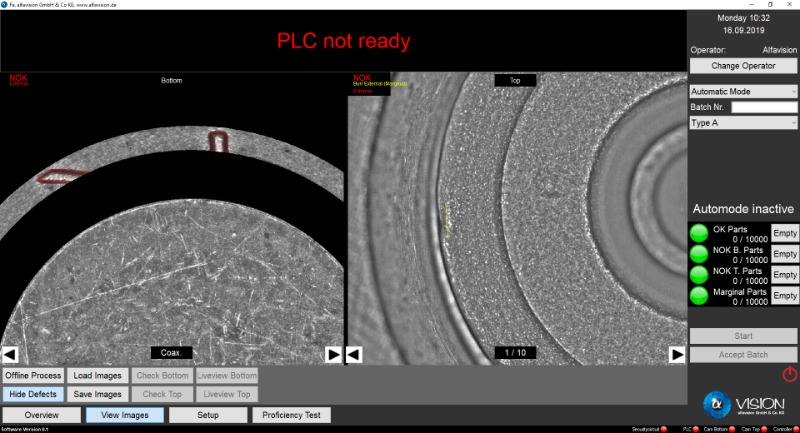
The classic binocular and manual test (fingernail test) provides that the component to be tested is moved in order to be able to detect defects under the different lighting conditions. This process represents an enormous effort for the alfavision customer. The customer’s machine produced faster than the individual valve plates could be checked.
The application areas of the Alfavision surface scanner
When asked where this alfavision surface scanner is used, Karin Donner replies: “When measuring components, when only incident light can be used for surface inspection due to space constraints”.
alfavision is currently building a surface scanner for the production of ceramic glass panes.
It’s also important that we can see the depth, says Donner, to check whether there is just dirt on the surface or an actual defect.
CEO Karin Donner
Den Messvorgang mit dem von Alfavision entwickelten Oberflächenscanner beschreibt die umtriebige Firmeninhaberin so: Das zu The bustling company owner describes the measurement process with the surface scanner developed by alfavision as follows: The component to be measured remains in place. The lighting required for the measurement process is moved. You measure from the side, from above and below and can thus accelerate the measuring process with this scanner.
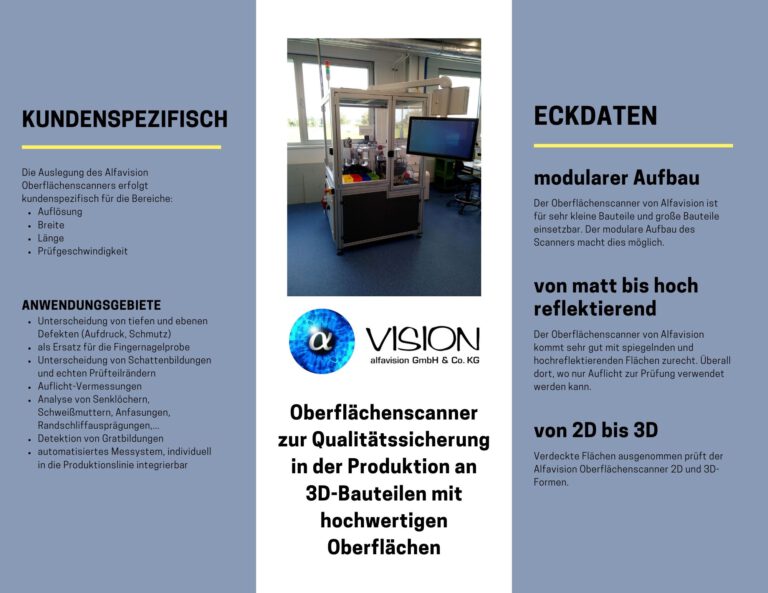
During the measurement process, the test system quickly creates a target/actual comparison. The basis for this is provided by the customer’s CAD drawing. This is called “quickly measuring target/actual comparison”, non-contact, in a stop-free position.
Modular design of the alfavision surface scanner
The alfavision surface scanner has a modular structure. The scanner elements are adjusted to the width of the component to be measured.
The surface scanner can be used to inspect very small as well as large components. Camera heads lined up without gaps allow the components to be inspected from the microscopic range up to a width of 3 meters.
Customer-specific requirements determine the resolution of the measurement images and the width to be measured. alfavision adapts its scanners to these requirements. This adaptation is carried out on site directly in the customer’s production line.
How does the customer find alfavision?
Scanners had been developed before, says Karin Donner. However, the earlier scanners did not have this lighting technology, because although they could see scratches well, they could not say whether the defect was superficial or deep. But that changed with the surface scanner.
First tests are carried out with a surface scanner at alfavision before a scanner solution is built for the customer. Photo: alfavision, surface scanner
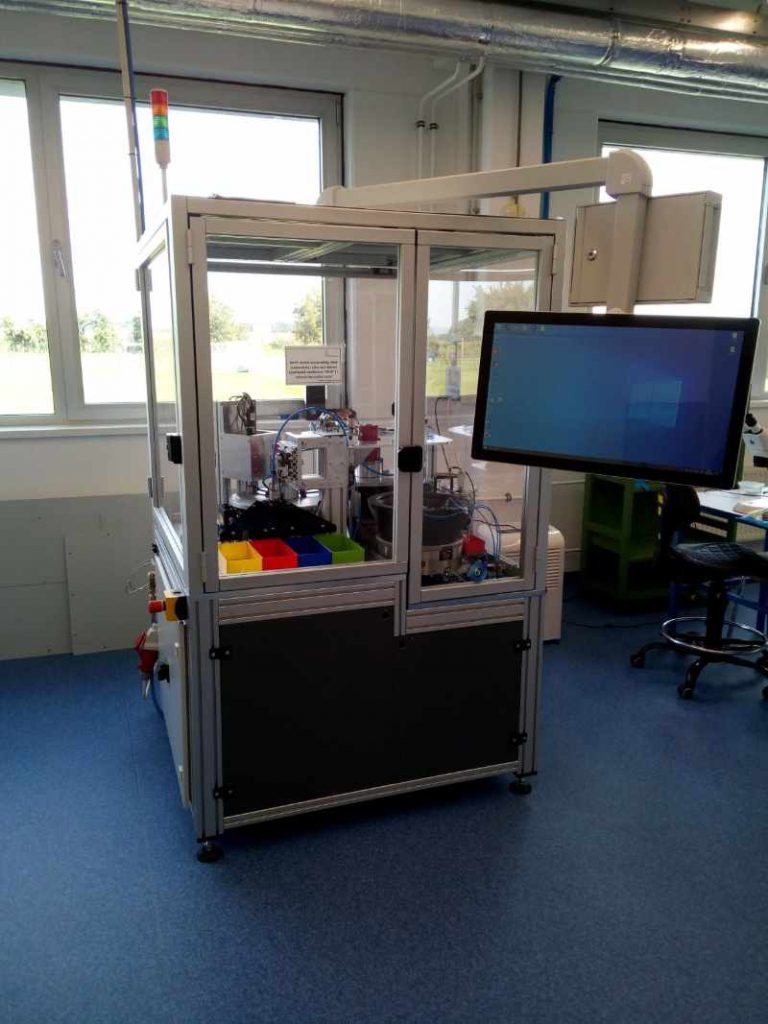

Normally, the customer comes to alfavision with samples and asks for a special measurement requirement that many other surface scanners cannot deliver. This is followed by feasibility tests, which are carried out with a surface scanner specially located at alfavision.
Karin Donner, a graduate mathematician, and her husband, Prof. Dr. Klaus Donner, also a mathematician, runs the company alfavision and develops precision scanners for the quality control of highly reflective and reflective surfaces. Photo: Karin Donner, LinkedIn profile.
Customers come to us with samples and say we have a problem here. In fact, we are problem solvers.
CEO Karin Donner
alfavision’s customers come primarily from the metal and electronics industries, but also include suppliers to the automotive industry. The glass industry is an important customer segment. It is precisely here that the alfavision surface scanner demonstrates its strengths when measuring highly reflective and reflective surfaces.
It is also common practice to always work with feasibility tests so that the customer receives a measurement system that is really tailored to their needs.
Our scanner can work very, very well with such mirroring and highly reflective surfaces.
CEO Karin Donner
Summary alfavision surface scanner
We have specialized in demanding applications to which others say: “I can’t do that, I can’t do it”.
CEO Karin Donner
With this quote, Karin Donner summarizes the central competence of the alfavision company. There is also a surface scanner that can handle highly reflective and mirroring surfaces very well. Because especially in glass production and in the electronics sector, every error must be detected at an early stage.
Alfavision’s surface scanner solves two problems at the same time: the measurability of defects on reflective surfaces and a possible production backlog caused by manual inspection.
